Showing posts with label snacks. Show all posts

Wednesday, July 25, 2012

Healthy eats on vacation...my "how to"

Tom and I just got back from vacationing at Wisconsin Dells.  We've been doing really well with eating right and making good choices so I didn't want that to stop just because we were going away from home.  I did end up eating some goodies and I'll tell you about that in my next post.  But this is all about my meal planning.  We stayed in a cabin with a fridge, fire pit and a microwave.  We brought a toaster with us. So I planned out all of our meals except for one dinner, which we decided would be a nice dining out experience :)

Here's my valient attempt at a stress-free healthy eating vacation...it worked too, because we only ate out once and it was planned!  Go us!! :)  Here's how we did it...

Step #1: Plan out breakfasts, lunches, snacks, and dinners (remember drinks too!)

Step #2: Be choosey on what, when and where you want to eat out.  Make sure it is something you will enjoy, you don't get often, keep it special so you won't feel like you are being deprived of eating out on vacation.

Step #3: Avoid typical camping food like premade salads (pasta salad, potato salad, coleslaw, etc.) They are full of mayo and won't fill you up.  Plan for lots of fresh fruits, veggies, hummus, string cheese and whole wheat crackers instead...think picnic at a rest stop instead of McDonald's drive-thru.

Step #3: Write down every single necessary food item to make those meals (don't forget condiments!)

Step #4: Write down every appliance, dish and utensil needed to make (and serve) the meals.

Step #5: Write down everything you will need to clean up or wrap up leftover food (think foil, cling wrap, zippy bags, paper towels, clorox wipes, etc.)

Step #6: Make a grocery list of everything you don't already have on hand.  Go shopping!

Step #7: Prepackage, prewash and precook anything you can.

Step #8: Pack wisely.  Utilize all those reusable grocery bags you get for free.  Put all snacks in one bag.  Put all appliances in another.  Pack all paper goods together, etc.  Take a small cooler for picnics or for day trips (to waterparks, theme parks, etc.) Pack a big rolling cooler with ice for all of your refridgerated or frozen items. 

Step #9: Fill up milk jugs with water ahead of time and put them in the freezer.  Then pack the cooler with them so you don't need as much ice and then you have drinking water at the end of the trip and you won't have to resort to that gas station soda!

Step #10: Enjoy, have fun and eat great food without guilt!


Here's a few photos of my food prep...

My shopping trip for some of our snacks and sides for the week.


We got a good deal on a meat bundle at HyVee...pork chops, brats (for Tom), chicken sausage (for me), chicken breast (I cut it up and precooked it).


I divided up the Pirate's Booty into individual servings.  Otherwise, I would eat half the bag in one sitting.  I also did this with my oatmeal so I wouldn't have to bring the huge container of oats or a measuring cup.


Prewashed cherries, blueberries, strawberries, cherry tomatoes, carrots, celery.


I used naan for my lunch sandwiches.  Naan, chicken, spinach, tomato and cheese...mmm.
The directions say they need to be warmed in an oven, but I just stick the pieces in a toaster :)

There it is folks...it does take time to plan, shop and pack, but it was totally worth it! 
I'll weigh myself in the morning and let you know my progress!

Wednesday, June 27, 2012

Healthy Energy Bites

Yesterday's post was lacking a picture of these little morsels of goodness! 
I made them this afternoon and they were super easy and delicious. 
Oh and I figured up the calorie count. 
They are 110 calories each.


Healthy Energy Bites:
1 cup oatmeal (quick oats)
1/2 cup natural peanut butter (or other nut butter)
1/3 cup honey
1 cup unsweetened coconut flakes
1/2 cup ground flax-seed
1 tsp vanilla extract
Mix everything together in a medium bowl until thoroughly incorporated. I had to use a little extra honey to make it stick together. Let chill in the refrigerator for a half hour. Once chilled, roll into balls and enjoy! Store in an airtight container and keep refrigerated for up to 1 week.

Tuesday, June 26, 2012

::Spice it up with new workouts and new recipes::

The other day I stumbled across an AWESOME website with hundreds of links to YouTube workout videos.  There's everything from Insanity to pilates to runner's stretches on it. 

Here's the link...


My goal is to try out a different one each week.

As for food, I am keeping up with 1/2 my plate being veggies at meal times.  Still trying to find some new recipes because I keep fixing the same ones over and over.  I did find a great recipe for Chicken Tortilla Soup and another for Energy Bites.  I haven't tried the soup yet, but the energy bites are DELICIOUS and super easy to make!  They have PB in them, but I seemed to do fine eating them.  Maybe I'm allergic to certain types of nuts like pistashios or walnuts, but not peanuts.  I don't know but I do know that the Energy Bites are difficult to pass up ;)

Chicken Tortilla Soup

1 rotisserie chicken (any grocery store will do)
1 carton chicken broth (watch for sodium and added preservatives)
2 jalepenos (chopped)
1 can fire roasted stewed tomatoes
1 can black beans
1 can corn
1 fresh tub salsa
1 tbsp chili powder (or more if you like it hot!)
2 flour tortillas (cut into strips and warm in oven for 5-10 min( depending on how crispy you like them)
Throw all ingredients into stock pot.  Bring to boil and simmer for 20 min.  Top with baked tortillas and enjoy!


Energy Bites (No-bake!)

1 c. oatmeal
1/3 c. honey
1/2 c. peanut butter
1 c. coconut flakes
1 tsp. vanilla
1/2 c. ground flaxseed (this is supposed to be REALLY good for you...if you can't find ground flaxseed, use a Magic Bullet to grind it up)

Combine all ingredients together in a large mixing bowl. Chill in fridge for 1-2 hours.  When they are chilled, roll into 18-20 balls. Store in fridge.  YUM!


Here's some Dr. Seuss motivation to leave you with...

I'm off for a jog!

Sunday, June 17, 2012

Goals

All year I've been talking to my students about the importance of goal setting in all aspects of life.  It's time for me to go from talking the talk to walking the walk.  My fellow sole sister, Jess has come up with a great weight loss challenge:

**Just to clarify, this is not to train for a marathon or run a marathon.  It's just to lose the amount of weight of a marathon.
Don't worry I'm still a slow jogger and 3 miles is still a stretch for me ;)

If I "lose a marathon" I will have lost just over 50 pounds!  Whoa. 
Crazy to think about. 
But that will put me right at my goal weight. 
This is just the thing to get me right where I need to be so I can be healthy.

So here's the plan...

Here are my exercise goals for the summer:

Eat to live, not live to eat.
Eat for my body, not for my heart or my head.
Exercise for my health, not to look good in a swimsuit.

This is how I plan to reach my goals with exercise:

I want to pick one of these activities five days a week.

jogging
walking
yoga
biking
resistance band/stretching
hiking

Since getting healthy is 30% exercise and 70% food I am making food goals a priority as well.  I already eat pretty well with eliminating sugars and preservatives.  I also eat a TON of fruit.  But I am still eating really big portions of my main course and not enough veggies.

This is how I plan to reach my goals with food:

50% of my meal/plate will be veggies or fruit.
25% of my meal will be starch.
25% of my meal will be protein.

I'm already part way there.  I just need to substitute some starches for veggies during meals and snacks and I will be good to go. :)

Snacks I have on hand:
triscuits
hummus
edamame
celery
carrots
cheese
hard boiled eggs
homemade popcorn
bananas
berries
apples
smoothies
grapes

Anything I am missing from this list that are great no sugar/high energy snacks??  I know almonds and peanut butter are great for you too, but I think I may be nut intolerant so I'm steering clear of those foods right now.


What are your goals?

Friday, March 30, 2012

Pottery and Pirate's Booty!

Last week my sis-in-law and I celebrated our birthdays together by going to paint pottery.  Today was the pick up day...it's always a little nerve-racking because you think about how much money you spent on the item and how much time you put into it and what if it looks like a pre-schooler did it??  But then you remember that you had a wonderful time painting it and it is what it is-yours.  And you will love it no matter what because you put your heart and soul into it...well at least your mom will love it ;)  Anyway, it was all good because when I went into the "pick up" room I saw a bowl and I thought I want that bowl.  Well, guess who's bowl it was??  This girl's.  Aw yeah.  It turned out exactly the way I wanted it.  It is a multi-functional bowl, so right now it's holding some gorgeous juicy apples.  It matches my kitchen along with another piece I made that is a utensil holder.  I'm excited!! 

Another great thing that happened to me today was finding an AMAZING new to me food product from "Pirate's Booty"  The name in itself makes it awesome already.  But what is inside of the clever packaging makes it double awesome.  Yes I know I just time warped back to 5th grade with that saying, but it's gotta be said.  Just hearing the name "Pirate's Booty" doesn't give you much clue as to what the product actually is, which just happens to be my most favorite snack of all time...cheese puffs.  Oh I have missed you cheese puffs and now I can have you because the wonderful inventors of "Pirate's Booty" made it sugar free, preservative free, nut free and DELICIOUS!  Here's a pic.  It's on sale at HyVee for 2/$3!!!!  Can you believe it??  All that crunchy, cheesy goodness for only $1.50!!!  I will most certainly have to go back tomorrow and stock up. 


Well, the house is smelling very cozy right now because I'm baking up some Apple Pineapple Crisp.  Sugar free love in the oven.  The recipe is in my last post. Mmmm...it's ready so I'm off to have some dessert!

Monday, January 23, 2012

Parmesan Crusted Tilapia & How I Met Your Mother

First of all, I wanted to thank all of you for reading my blog.  I have received so much positive feedback about it.  I'm glad you are enjoying reading about my adventures in the kitchen and I have been praying that God would use my blog to inspire you through my writing and of course, lots of pictures. :)  I also appreciate all of your encouragement as you come along with me on my fight against migraines.  This whole not eating sugar thing has taken some serious prayer and lots of support from my amazing husband, family, co-workers and friends like you.  Thank you.

The Great Migraine Battle stats are in:
Laura : 21   Migraines : 2

I tried another Larabar today.  My friend from work was so sweet to bring me an assortment of Larabars this morning.  Cherry Pie, Banana Bread and Peanut Butter Cookie.  Guess which one I tried first???
Well yes of course!  Peanut Butter Cookie :)  It was really delicous and satisfied my sugar craving this afternoon.
Peanut Butter Cookie
I love you Larabar...and it's not just because you have a rockin' cool name ;)

Oh a random note, I love How I Met your Mother.  So I'm writing this as I'm watching Monday night tv in my pjs.  Doesn't get better than this.  Tonight I was really tired so I made a super easy recipe. 

I found a recipe through Pinterest that is a Rachel Ray creation. 

Here it is friends...

Pinned Image
Parmesan Crusted Tilapia
  • ¾ cup freshly grated Parmesan cheese
  • 2 teaspoons paprika
  • 1 tablespoon parsley
  • 4 tilapia fillets (about 1 pound total)
  • 1 lemon, cut into wedges
Directions: Preheat the oven to 400°. In a shallow dish, combine the cheese with the paprika and parsley and season with salt and pepper. Drizzle the fish with olive oil and dredge in the cheese mixture. Place on a foil-lined baking sheet and bake until the fish is opaque in the thickest part, 10 to 12 minutes. Serve the fish with the lemon wedges.
**Miss Rachel claims 10-12 minutes, however, I must have had some stubbern tilapia because mine took about 23 minutes to cook through.  I baked it on a Pampered Chef baking pan with foil so I don't know if that affected the cooking time or not.  Just keep an eye on it and when it flakes with a fork it's done.
I served it with couscus, naan, sauted mushrooms and a spinach salad.  Awesome and easy.  Love love love.
Tom also loved it.  I blinked and his fish was gone.  Sweet. 
Well, I'm off to go make some banana blackberry ice cream. 
1 frozen banana + handful of blackberries + 1/4 c. milk + magic bullet = tricking my brain into thinking I'm eating ice cream.  Yessssssss.....

Friday, January 20, 2012

Breakfast for dinner & Larabars for breakfast

Another day of no migraines!  Yes!!! 
I am SO excited about only having two migraines so far this month.  It is amazing. 
The Great Migraine Battle continues...

Laura : 18   Migraines: 2

Still haven't caved.  I didn't know I could do it.  It's amazing to be able to belive in myself and not be dependent on sugar.

Another encouragement is that I have lots 6.5 lbs since the beginning of the month, which is a great bonus.

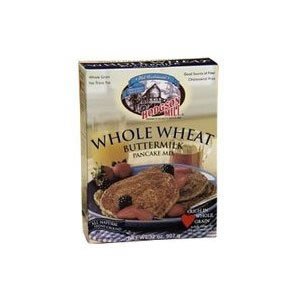
Tonight was breakfast for dinner.  Boy do I love breakfast food!  Once again we had whole wheat pancakes with scrambled eggs.  So thankful for the Hodgson Mills company who sells that awesome pancake mix! 
Hodgson Mills Whole Wheat Buttermilk Pancake Mix (6x32 OZ)
They even have recipes for biscuits and waffles on the back of the box.  I can't wait to try the biscuits!  It will be nice to eat a biscuit again :)  I'll let you know how they turn out.

Today I made another great discovery!  I can eat LaraBars!  My friend brought me the Apple Pie one today and I ate it for breakfast.  Delish!  The ingredients are all natural...they use almonds, dates, apples, cinnamon...all ingredients that work for my migraine control diet.  There are other kinds and I am excited to see if I can have other flavors. 
This is the blueberry muffin bar.  Sounds GREAT too!


Saturday, January 7, 2012

Homemade Goldfish Crackers & Homemade Garlic Naan

Tonight I embarked on a journey I never thought I would...

I baked my own Goldfish Crackers from scratch...and the craziest part of it all is I actually enjoyed it!  It's a sugar free recipe.  It calls for all-purpose flour, but I substituted whole wheat flour.  They just came out of the oven and boy are they yummy!  They don't have the same consistancy as a real one, but they have the same taste. 

Word to the wise...you DO need a food processor...a real one...you know the kind you plug in.  Not the kind you hand pump from Pampered Chef.  Not a Magic Bullet.  Not just a wooden spoon and some anger.  A real food processor.  Lesson learned.  Buy a food processor. 
Anyway, totally worth it so here's where I got the recipe.  She even teaches you how to make your own goldfish cookie cutter out of a soda can!  I did it so you can too.

 Here's what the dough looked like all rolled out.
Here's the homemade cookie cutter.


I also baked my own garlic naan because I really couldn't handle paying $4 for 3 pieces of bread.  So I found a recipe in a Pampered Chef cookbook...you know the little thin ones they give you for bringing a friend to a party. 

It turned out pretty tasty...a little dry, but if you brush some butter on it I bet it is yummy.  I just tasted a corner because I kind of filled up on Goldfish...hehe.

Here's the recipe for the naan:

1/2 c. grated fresh parmesan cheese ( I used the Kraft stuff you get in the plastic container in the "fancy cheese" section)
1 c. flour plus additional for dusting ( I used whole wheat flour...they recommend cake flour)
2 tbsp parsley
1/2 tsp salt
1/4 tsp baking powder
1/2 c. milk
1 tbsp olive oil
1 tbsp. minced garlic (of course this was not in the original recipe, but I added it cause garlic rocks my world)

Preheat the oven to 350 degrees.  Combine flour, parsley, salt, baking powder in mixing bowl and mix well.  Add milk and oil; mix thoroughly to form a soft dough.  Place dough on lightly floured cutting board.  Knead just until dough is smooth and no longer sticky, adding additional flour as needed. Roll dough into rectangle baking stone dish.  Brush on minced garlic.  Bake 23-26 minutes until deep golden brown.  Remove from oven to cool completely.  Yields 12 servings.
Just out of the oven.